This rather lengthy blog article describes what was also a rather lengthy process to produce a picture for our 2016 family Christmas card. All props used in the photograph were home-made (or in the case of the rocks - taken from the garden). The Wallace and Gromit figures, spaceship & ladders were 3D printed on my Mendel 90 printer, and the background was a large poster print of a photograph I took in 2015. Apart from a few tweaks to such things as 'levels' and 'white balance', the only 'Photoshopping' was to add the greetings text and Santa sleigh silhouette. If this is the first time you have visited my 3D Printing site, you may need a little, not much, technical input before reading much further so here goes...
Since 2012, I have built three 3D printers from their component parts, each being a replicating rapid prototype or 'RepRap' machine. The specification, design files and build instructions for many RepRap machines are open source which, in a nutshell, means that they are available to everybody for free. There is also a growing community of makers, such as myself, who contribute to the open source development of the technology as well as to the wealth of design files for the objects or 'things' which can be made. More detail can be found on the RepRap.org website. You may also like to take a look at a very informative video HERE. My 3D prints start out life as spools of coloured plastic filament a bit like spaghetti but much longer. The type of plastic material I normally use to make things, is a derivative of corn starch called PLA (polylactic acid) and therefore biodegradable - no fossil fuels were used to create Wallace and Gromit! Finally, it is worth mentioning that one of the most popular file sharing sites for people with 3D printers is Thingiverse.com (what else?).
Should you wish to fast-forward or leap around this article, I have included some hyperlinks to enable you to do this as follows:
In 2015, rather than send our usual "bought in a box from WH Smith" type Christmas cards, I decided to design my own and have it printed commercially, for no other reason than I had taken a photograph earlier in the year which I thought would be just right for such a purpose. I searched the internet and found a company called Solopress who advertised a 'Create Your Own' service for all sorts of printed media at very competitive prices; so I got to work and ordered 100 cards - A6 size, double-sided and printed on 350gsm silk card - with envelopes too and free postage and packing. Bargain, eh? Creative ego boosted, I sat back and when they arrived was as pleased as punch - brilliant. Now fast-forward to November 2016.
When autumn 2016 arrived, my mind turned to the subject of Christmas cards once again. Unfortunately, unlike the previous year, none of the photographs I had taken in 2016 cried out 'Christmas card!'. Saying that, a few photographs taken on our second visit to Iceland, during a David Noton Photography adventure trip in February/March, had potential simply because they showed snow!
During the first week of November though - and not thinking about Christmas cards - I came across a model of Wallace and Gromit which had been uploaded to Thingiverse by Steve Solomon aka 'reddadsteve' on 31st October. Simply put, this model was amazing! Standing at around 250mm tall, the detail was incredible. Reddadsteve had certainly put a lot of effort into this creation, so I just HAD to make it - who could disagree? You can see Steve's model on Thingiverse by clicking HERE. Not exactly Christmas card material? Well ..... the BBC do feature W&G every year at the festive time and maybe I could dig out a suitable, Christmassy background from some of my Iceland pictures? That thought put aside I continued with the production of a 3D printed Wallace and Gromit.
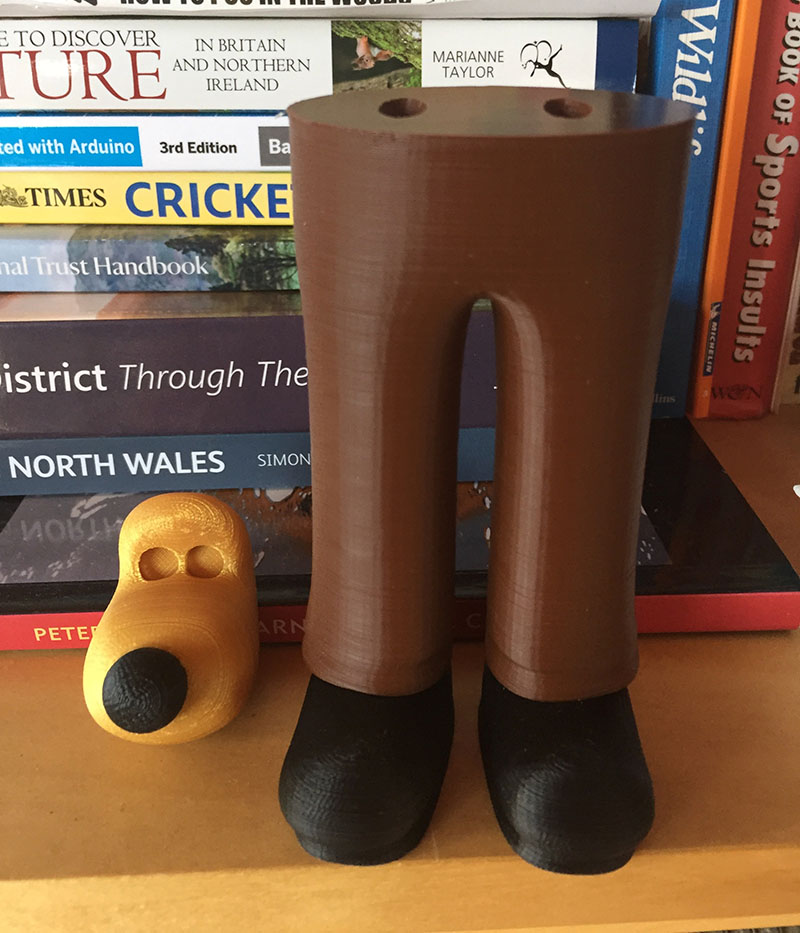
My Wallace and Gromit 'made it' can be seen HERE, picture below. I was able to select the colours I needed from the stock of PLA filament I already had, sourced from a company called 'Faberdashery'. Colours used as follows - you should be able to match them to the different parts of the model - woodland brown, classic black, arctic white, greenery green, bling bling gold and firetruck red - all easy choices which matched the original Aardman models perfectly as far as I could see. The only difficult choice was the colour for Wallace's head, nose, ears and hands. In the end I settled on 'vanilla milk' which looked quite good, albeit a wee bit pale.
I took a few photographs during the assembly stage which are presented below.
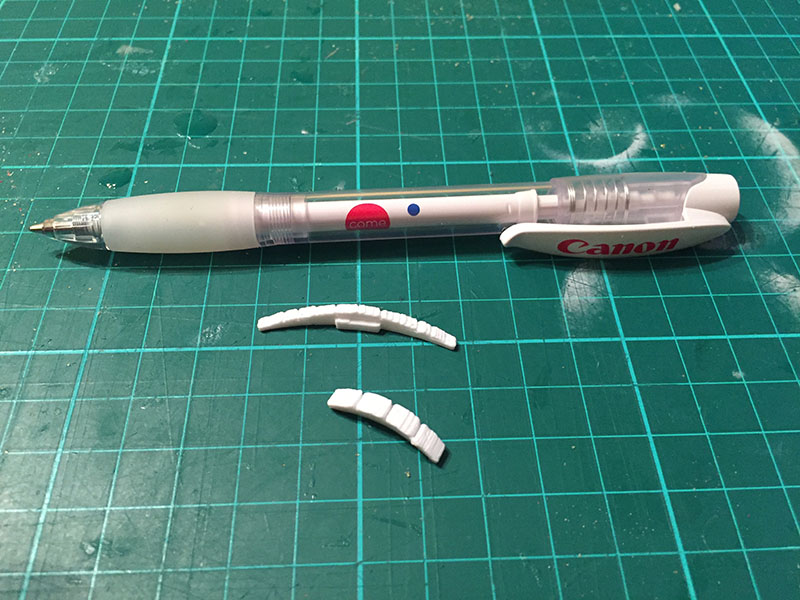
The photograph above shows Wallace's top and bottom set of teeth prior to gluing them into his head piece.
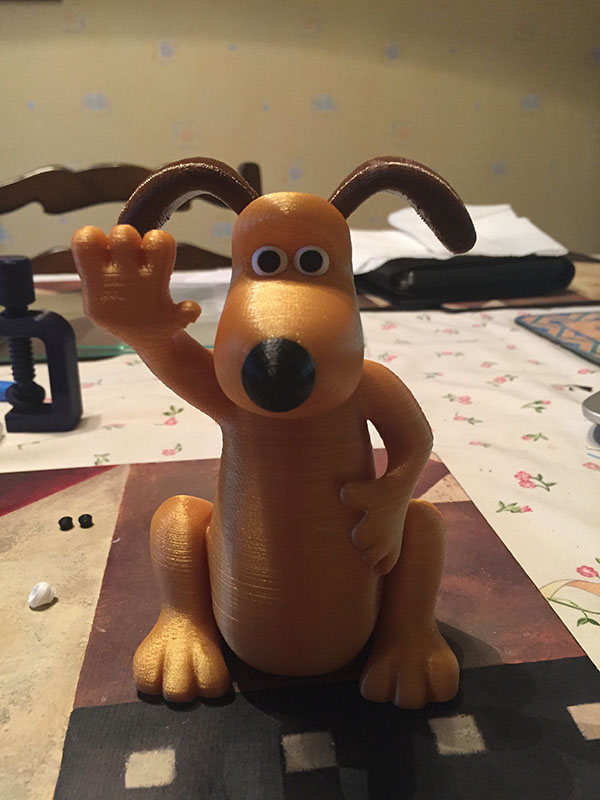
Below: Gromit completed - you can see three pieces of Wallace's eye components close by - the white of one eye and two eyeballs.
Although I was reasonably happy using 'vanilla milk' for Wallace's head pieces and his hands, I sort of knew that he would look a lot better if I could get hold of the 'skin' coloured plastic which I had seen on similar models shown in the 'I Made One' section of Thingiverse. However, despite quite a number of internet searches, I was unable to come up with a supplier in the UK. I suspect that if I could find a supplier, it would be in China and any order would take weeks to arrive. No matter - I will stick with a pale-faced Wallace.
A week or so later, on the 14th November to be precise, I went to the monthly 3D printer user group meeting in the newly relocated Hackspace in Manchester. As is customary, I got a reminder from Mary of the impending 3DPUG meeting in the morning. Mary is the wife of Chris who designed the Mendel 90 RepRap machine and together, until recently, they were in the business of selling component parts to enable self-builders like me to make their own printer. Chris, aka Nophead, has been involved in the development of 3D printer machines for a number of years and was one of seven contributors to the RepRap Project paper, published by Cambridge University Press in 2011 and authored by Adrian Bowyer from the University of Bath. That night I took my Wallace and Gromit models, along with a few other 'things' I had made since the last 3DPUG meeting, for what amounts to a 'show and tell' session. (I am normally the main show-er and tell-er as I seem to be the only one of our small group who reguarly keeps an eye on Thingiverse, scouting for the interesting, amazing and curious uploads which appear from time to time). There were only four of us at the 3DPUG meeting this month: me, Chris, Mary and Bob who founded the group around 3 years ago and who is one of the principal organisers of the Manchester Hackspace. After showing off Wallace and Gromit and going through the various colours of plastic which I had used, Bob disappeared into a corner of the room we were in and came back with a small spool of PLA. "Here - you can have some of this. We got it given to us with a batch of other stuff." What was it? A spool, well, half a spool, of PLA marked with the words 'Skin Color'. Great stuff - no prizes for guessing what I am going to make tomorrow!
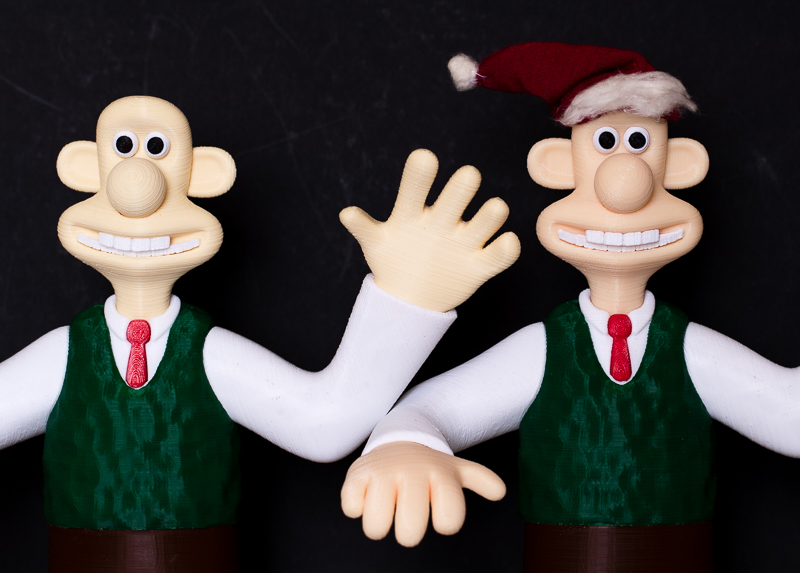
Tomorrow came and Wallace2 was printed - colours the same as Wallace1 apart from the substitution of 'skin' for 'vanilla milk'. To be honest, I could have snapped off the head and hand parts from Wallace1 and just replaced them with skin coloured parts as PLA is notoriously difficult to glue, and I am sure that these parts would have been quite easy to remove. However, I had grown quite attached to Wallace1 by this time and couldn't bear to dismantle him. The result - twin Wallaces, one being pale Wallace, the other being more realistic Wallace - picture below. Can you tell the difference? (Don't worry if they both look the same - the internet is not the best way to compare colours).
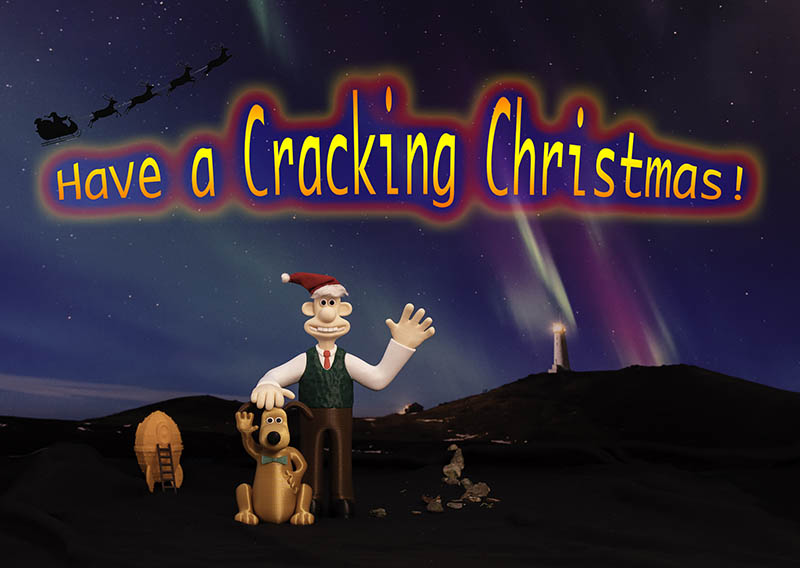
In the days preceding the print of Wallace2, my mind had been working overtime trying to work out how this year's Christmas card scene was going to look. I had the words sorted for the card greeting - nothing too creative, the greeting almost wrote itself: "Have a Cracking Christmas", (you might need to have seen a few Wallace and Gromit films to appreciate the humour) and it was 100% certain that my 3D printed models were going to feature somehow but in what sort of scene? About this time, Photobox, the company I have used to print all of my photobooks, sent me a marketing email advertising "Up to 70% off everything". However, I wasn't overly excited at this as they are always coming at me with these sorts of things; but this prompted the idea of using one of my photographs, printed as a poster, as a background image for the Wallace and Gromit figures - something Christmassy perhaps with snow? The background would need to be pretty big as Wallace stands around 10* tall, (250mm in new measurements) and I needed space for the greeting - probably above the two figures. The search began - I was after a snowy landscape in front of which I could place my two 3D printed friends. Size? I needed to go as large as Photobox can go - a poster print measuring 45" by 30".
The short list of background photographs is shown below - I got them all printed at a cracking price of £4.50 each post free which isn't bad for 45" x 30" posters - matt finish. (There is a story behind this low price as it is not exactly the one advertised by Photobox - perhaps another blog article is needed).
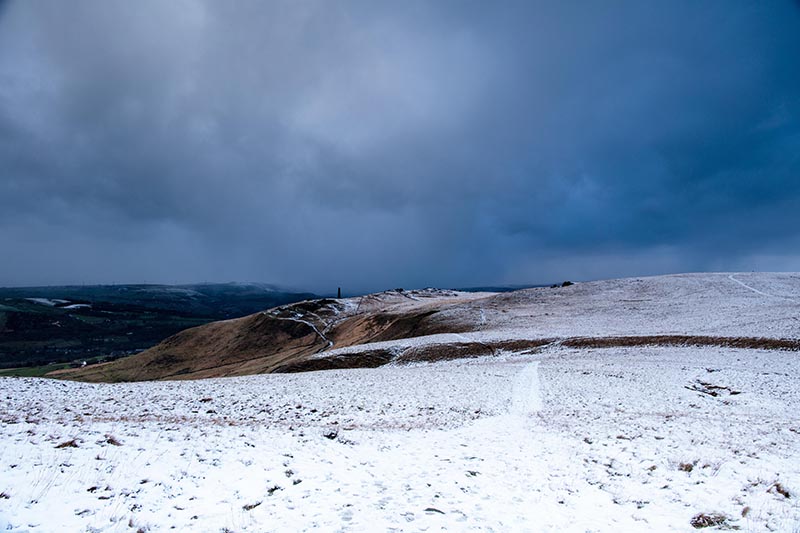
This photograph was taken earlier this year on a hike which started off at the Church Inn, Uppermill and took me as far as Alderman's Hill which overlooks the Dove Stone reservoir. The return journey was via the war memorial which can be seen in the far distance. As a background, it is snowy so it should be relatively simple to merge the photo with cotton wool which may form the standing ground for Wallace and Gromit. It is also a local scene which to my mind gives it some plus points.
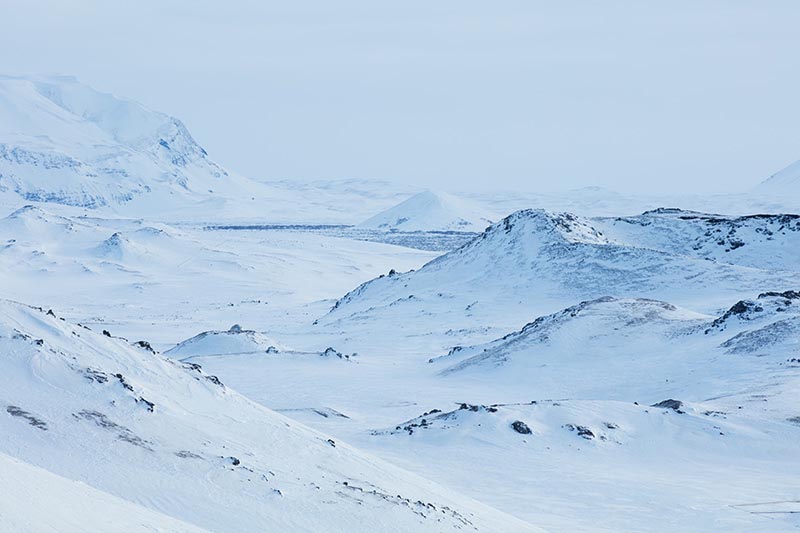
Photograph taken in Iceland earlier in the year. Like the photograph above, it has the advantage of depicting a snow scene which gives a Christmas feel and which I could carry on down to a cotton wool foreground for Wallace and Gromit to stand on.
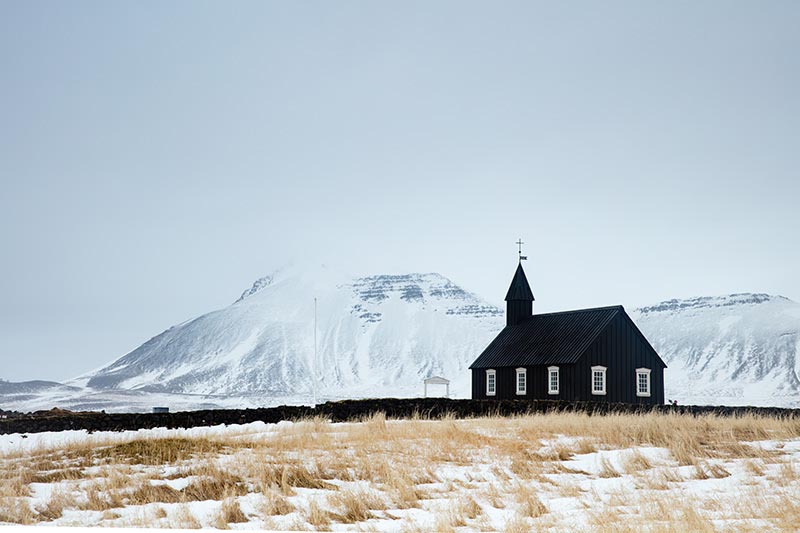
Another Iceland photo showing an isolated church against the snowy mountains. Plenty of grey sky to carry the greetings text. The figure near the church is one of our group who seemed to find his way into a lot of my photographs from the trip - and into the photographs of quite a few others. Could get some interest from those of our group who use Facebook should I end up posting the final picture; but the brown grassy foreground could be difficult to work into my table top scene.
Taken in Iceland at the end of our 2015 trip - an amazing sight which I think has some impact. The foreground could be relatively easy to work with if I reduce the shadow detail and increase contrast in the final image.
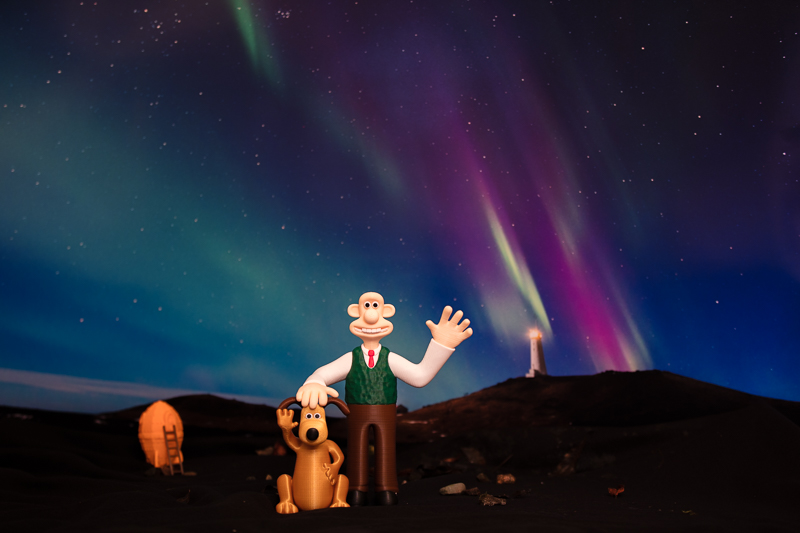
Although three of the shortlisted images carry snow - something which appears on a lot of Christmas cards - I decided to use the aurora borealis picture as my background for two reasons. First of all, this is the image with more direct impact in terms of 'wow' factor (in my opinion anyway); and secondly, I had the idea of using it as an 'outer space' background, something akin to the scenes from Wallace and Gromit's first film, "A Grand Day Out".
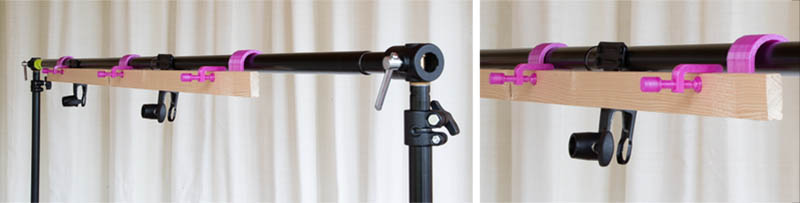
That decision made, attention turned to building the scene which I was going to photograph. To support the background I had it in mind to use a fabric background support system which I had used for various portrait photoshoots in the past. However, this is a poster, not a fabric, and there were no hanging loops on the poster. Thinking cap firmly in place, I came up with the idea of making a hanging rail for the support system to which I could attach the poster and a backing board using some sort of clip. The hanging rail would consist of a strip of wood which I found in the garage attached to three 'loops' to go over the support rail. Of course, I had no such loops to hand but a quick sketch using my CAD system and one 3D print later, I was in business. Photographs of my hanging system below, including the "clips" mentioned above.
.
The clips which you can see are actually plastic G-Clamps and are worth mentioning at this point, as they proved quite effective and no doubt will be used in future projects. Yes - I suppose that I could have used normal spring clips from the stationery shop but where's the fun in that?
They were 3D printed (of course), and derived from a Thingiverse model uploaded by johann517. My first "I Made One" can be viewed here but as you will see from the image shown, the original was far too big for use as a simple paper/card clip on the arrangement above. I therefore scaled the model down, printing 8 G-clamps at 60% of the original size (in a nice translucent pink colour which has rather an appropriate name for this project: Aurora).
The clamps worked perfectly direct from the printer - yet another great model on Thingiverse. (My 60% 'made one' here).
The clamp at the top of the photograph is at the original size printed in Galaxy Blue - contains some nice sparkly bits. Below it is one of the Aurora clips used to clamp my background poster print to the hanging system above and to the sides of my backing board.
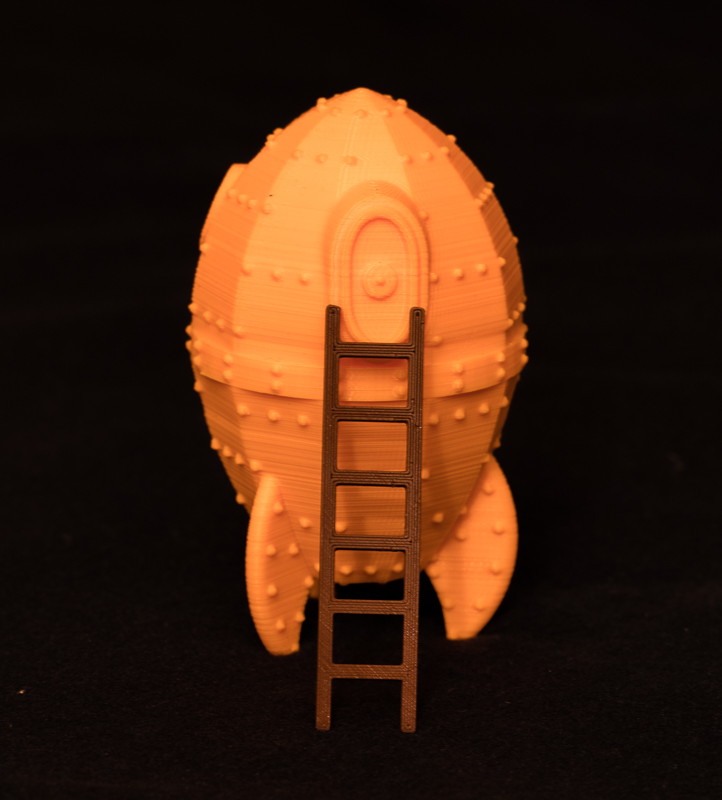
Almost ready to set up the shoot now, but there was just one thing missing. If Wallace and Gromit were to be shown in my take of a scene from "A Grand Day Out", then for real authenticity, I needed to include their spaceship and ladders. Yes - you're ahead of me now ... another search on Thingiverse led me to a model called "Wallace & Gromit Rocket" by Erno Retsya. It was designed to be printed in two halves and when complete would stand at a height of around 50mm - maybe a bit too small for my Wallace and Gromit despite it being placed far away in the background. No real problem though, and I decided to scale it to double the dimensions provided by Erno in order to give me a spaceship approaching 100mm tall.
No ladders though - and nothing suitable on Thingiverse - so I had to make my own. Ladders are quite easy to draw on my CAD system, certainly not an exercise as momentous as designing Wallace, Gromit or their spaceship so it didn't take too long before my printer was running again. Final results below.
Completed spaceship printed in 'Squeezed Orange" PLA filament - top and bottom half glued together - and my ladders in 'Woodland Brown'.
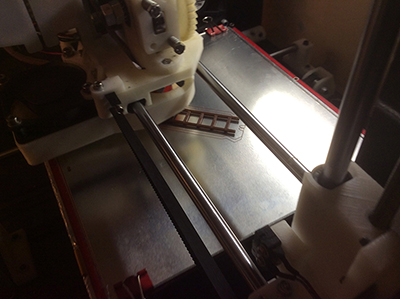
A snap of the ladders as they were being printed - almost finished.
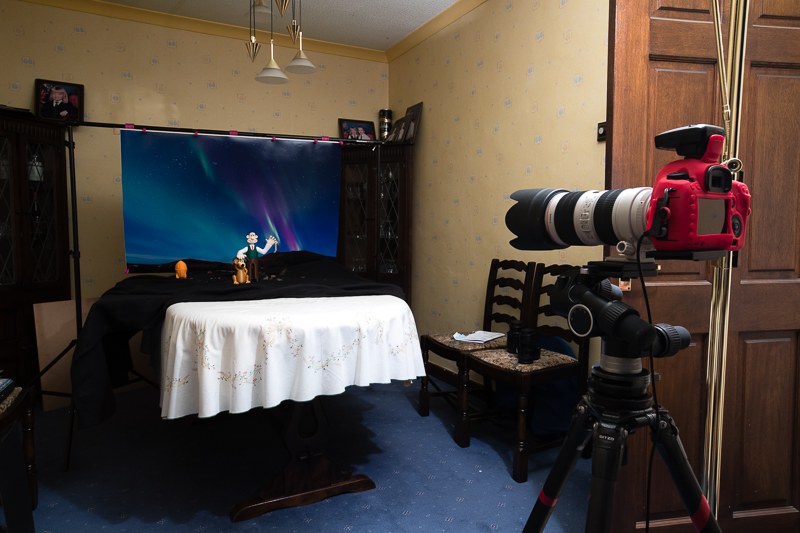
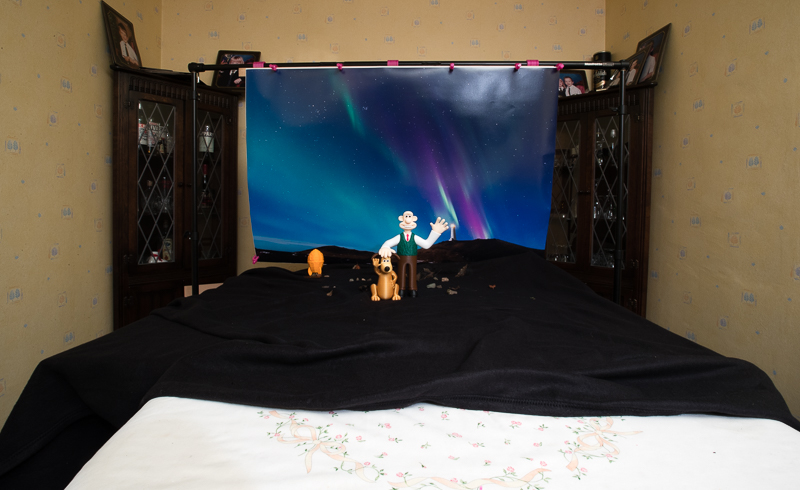
With all props gathered together - black blanket retrieved from the shed and stones gathered from the garden - I was ready to build my photo scene on the dining room table and set up my camera on a tripod. The plan was to light the scene using light from the window, but it soon became clear that despite the poster having a matt finish, this would not be possible as there were far too many areas of glare on the auora poster which I was unable to remove without completely covering the window with a large black collapsable background, normally used in portrait photoshoots. (Must have looked quite odd to anybody walking or driving past the house with that sat on the window cill). There were two other light sources available to me: the ceiling lights and a floor lamp - both had controls which would allow me to brighten or dim the scene, which proved useful. I decided to use the floor lamp as I could position this in such a way that I could reduce reflections on the poster to a minimum. This was not easy to do and I spent quite a long time trying different angles for the poster, and dim settings on the lamp.
The final part of the exercise was to try and set up a realistic-looking scene, merging the foreground containing my 3D printed props with stones from the garden on a black blanket with the background poster.
In this front-on photograph you can see the reflections, top right, on the aurora poster background, which I was trying to remove by changing angles of the poster and shifting the position of the floor lamp. Not an easy job - it took a while.
The result of what ended up as the first of two photoshoots is presented below. Two photoshoots? The story continues - we are not finished yet!
Since uploading my 'I Made One' photo to Thingiverse, I had been in a message conversation with Steve Solomon who, you may remember, created the files which enabled me to print the two Wallace and Gromit figures. This turned into an email conversation just after photoshoot number 1 when I mentioned my Christmas card project. Maybe that was not such a good idea as, within hours, Steve replied:
"Alan, I know that you are tied up at the moment but I thought that I'd take a minute to compliment you on your website and photography skills. I looked at the rocket with the background and am now even more anxious to see the final product.
How about a Santa hat to go on Wallace? And maybe a bow for Gromit?
Regards, Steve"
Although pleased with his comments regarding my website and my 'I Made One' post on Thingiverse for the Wallace & Gromit rocket, it was his last sentence which had the biggest impact on me. "He's right," I thought - and when I mentioned it to Lyn, "Good idea" she said. "But I've just finished it!". Ho humm - there's always room for improvement, and the suggestion of a Santa Hat and Bow Tie were such obvious improvements, there was nothing for it - they had to be made and Photoshoot 2 set up.
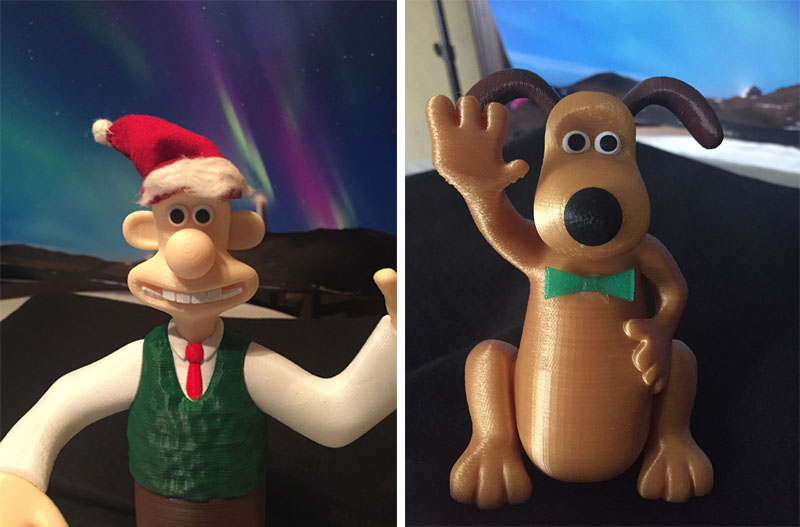
The bow tie for Gromit was a relatively easy job - a quick sketch on my CAD system and a 3D print to follow took less than an hour. However, the Santa hat was not so easy - with respect to Nick Parks, Wallace's creator, he has such an odd-shaped head; and designing a Santa hat which would look the part when 3D printed was not something I was particularly confident about doing in the time available. (I wanted to get my artwork done for Solopress within the next couple of days as Lyn and I were off to Norfolk for a week's holiday at the end of the month). No, this was time to put 3D printing to rest and concentrate on more traditional crafting methods, needle, thread and fabric ... of some description. Making enquiries of Lyn as to what we had in our sewing box which may be useful, she was well ahead of me and came back with the finished article which she had fashioned from a red glove taken off a soft toy and decorated with cotton wool. (Don't ask where the soft toy came from - I haven't a clue!). Great stuff, we're away! All that remained was to glue the Santa hat on Wallace and the bow tie on Gromit. Ready for Photoshoot 2.
Ready for Photoshoot 2 - Wallace with his Santa hat and Gromit with his transluscent bow tie.
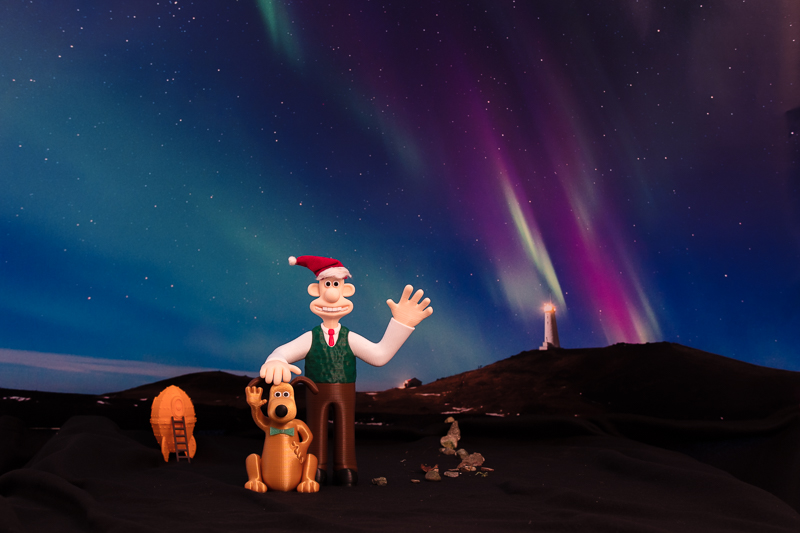
Having done all this before, the second photoshoot didn't take very long at all in comparison to the first as I knew what camera settings I wanted, the requirement to block out light from the dining room window, and the sort of positioning I wanted to achieve for the figures.
Photoshoot complete, we were into the final straight which was to add the Christmas greetings text and Santa sleigh graphic to the final photograph. Result - as shown at the top of this article.
Will I do all this again next year for Christmas 2017? I probably will - just need to keep my eye out and brain ticking over for an idea but suspect it may take a while.
Thank you for reading through this post, it's appreciated. Let me know, via the 'Contact Us' link in the top menu, if you have any questions or want to make suggestions on how you think I could have made things better. (I will keep it in mind for next year).